Blog

 RSS Feed

  1. Generally, if you're torch firing or using a gas hob, the longer you fire your piece, the better.  Each brand has a different firing time and if torch or gas hob firing, the time depends on the size and thickness of the piece.  I never fired for less than 10 minutes - in fact, I've been known to stand with a torch in my hand for 15-18 minutes for thicker, larger, copper pieces!

    However, I was fascinated as to exactly why it was better to fire for slightly longer than to underfire and when I was researching, I came across a fantastic document that explained the process very simply and I'll try and replicate what I learned.

    Basically, you can't over-fire a piece but there comes a time (usually about 2 hours) when the metal isn't going to change any more and you're just firing for the sake of it!  However, you can underfire.  Underfiring is difficult to see because the outside of your piece may look like metal but if you break it open, inside it would be chalky which is why firing for longer than the manufacturer's minimum recommended time is always a good idea.

    I always fire for longer than the manufacturer's recommendations - whether using a gas hob, torch or kiln. Be warned though, if you're using a large torch (especially if firing silver) you can easily turn the flame way up higher than needed and you go beyond the point where it should be sintering and it will start to melt. Once melted, there's no going back. Normally the piece will be ruined with the surface becoming uneven and bubbly. To recognise when a silver piece starts to melt, you'll see it start to shimmer and look very shiny instead of the salmon pink/red you should see when you're firing correctly. With copper, the same thing happens and it goes a bright shiny yellow. I'll post some photos at a later date.

    So what happens to the clay when it turns to metal?  Well imagine the clay before firing is like a pile of boiled sweets. Between the sweets, even if they touch, you'll see spaces. These are areas of weakness and the strength at this point only comes from where the sweets are touching each other.
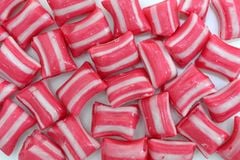
     boiled sweets1

    As you fire, the sweets start to melt and the gaps lessen. This gives you more strength because there are now more contact places.
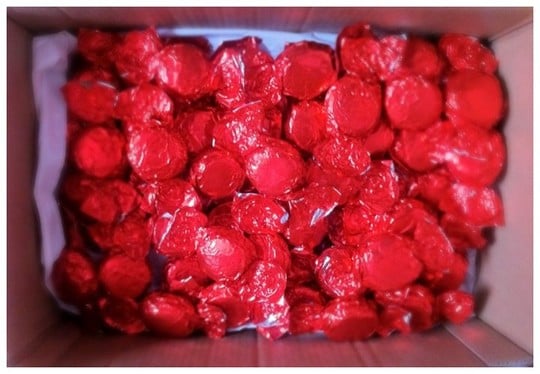
    boiled_sweets_melted_90_1_75

    If you continue to fire, the sweets will melt even more but even at the ultimate firing (when no more changes occur), there are still thinner areas where there's not enough sweet to melt. It doesn't matter how much longer you fire, this won't change. However, at this point you will end up with a lovely piece of firm, durable metal!
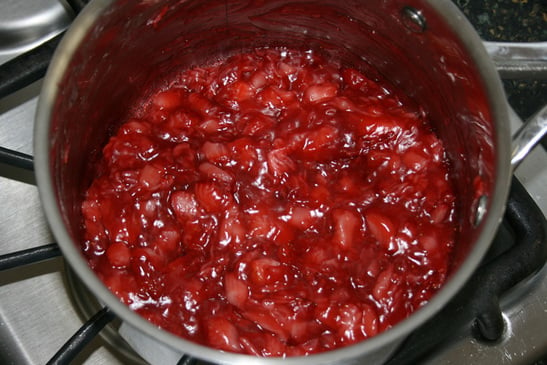
    boiled_sweets_melted1_75_1_75

    Disclaimer: No sweets were harmed in the making of this post.

  2. You're probably familar with clay but are wondering what slip/paste and syringe clay are used for?  At the moment, paste is only available for silver metal clay (although I'm sure it won't be long before ready made copper and bronze paste is developed) but you can buy pre-filled syringes for silver and, in some brands, copper and bronze.

    Paste or slip (the words are used interchangeably and refer to the same thing) is simply clay that has been watered down to give it the consistency of thick cream.  It will definitely become your new best friend!   Similarly, metal clay syringes are filled with a slightly thicker consistency than paste.  Both paste and syringes are used for so many things for example, filling areas, sticking pieces together, using with a paintbrush to add a design, syringing fine lines, squiggles, or dots to add detail and the list is endless!

    For some applications you'll use paste quite thickly but other times you may want to add water to a small blob on your work surface so you have a thin cream consistency.  To avoid your whole pot from becoming too watery, with a paintbrush take some out of the pot and put it on a non stick surface, you can then add a tiny amount of water and mix to get the consistency you need.

    If you've bought a pot of paste, you'll probably only ever buy one as you can add to it!  How do you add to it? It's easy! Every single time you sand anything before firing, sand over a piece of paper to catch all the "dust". All this dust is silver so don't waste it and DON'T do what I sometimes do when sanding a small piece and blow it away!!!! Have a dry paintbrush to hand and if there are still bits that have been sanded on your piece, brush them onto the paper with your brush.

    Simply fold the paper into a funnel and drop the filings into the paste pot!  Add one short spritz of water into the paste pot (not always necessary) and the filings will be absorbed into the paste!  Similarly, if you have made a dried piece that you look at and think it's not worth firing, grind it down in a pestle and mortar to make it into a fine powder and add that to the paste pot also!  If you are adding to your paste pot, please be vigilant and try not to add anything other than clay to it.  Please make sure if you use a pestle and mortar for metal clay that it's not one that you use for food.

    If you're using a metal clay that doesn't have a ready made paste you can make your own. Take a small lump of clay and put it in an airtight container. Spritz a little water over the clay and mix together (I use a small spatula but you can use anything to hand like a lolly stick or tooth pick). Keep spritzing and mixing until you get to the correct consistency. If you add too much water, put a bit more lump clay in. If you don't add enough water the paste won't be smooth. You're looking for a smooth paste.

    A tip! Copper and bronze paste, even if stored in an airtight container, will harden and oxidise in storage. You can bring this back to life but I've had less success using paste that has needed life saving measures!  It's much easier to make a paste each time you need it rather than try to store copper and bronze paste.