How do I turn the clay into metal?
Posted on
For anybody starting out with metal clay, the bit that normally scares people (enough to put them off sometimes), is that metal clay has to undergo a firing process to turn the clay into metal. It sounds daunting when I explain the process but please read on because it does get less scarey!
When you apply heat to the clay, the heat increases, nearly to the point of melting, which causes the organic binders to burn out and fuse the silver particles together to form a hard metal. How on earth are you going to do that in your home then?! Well, you can use your gas hob if you have one, a camping stove or a hand held cooking torch - not so frightening is it? When you look at it like that, it's not too far removed from cooking! Of course, if you love using metal clay at some point you might want to invest in a kiln but when you're starting out, the last thing you want to do is purchase a piece of expensive equipment! So let's look at the cheaper alternatives!
1. A gas hob: If you want to use a gas hob all you need is a piece of metal wire mesh that covers the gas burner and widest part of the flame with some overlap. The ones used for metal clay are typically around 15cm square and they can be bought very cheaply from specialist suppliers (www.metalclay.co.uk normally has them in stock). You'll also need a pair of tongs or tweezers that are heat resistant. These are not essential as you can turn the gas off and allow the piece to cool after firing, (approximately 20 minutes or so) but they're good to have and you'll find you use them quite a lot once you have them.
2. For a camping stove, you'd need exactly the same equipment.
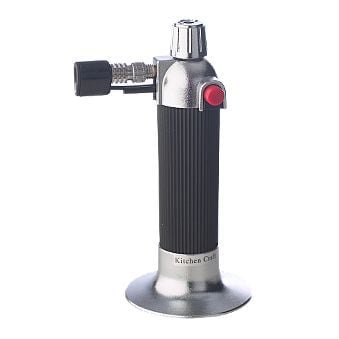
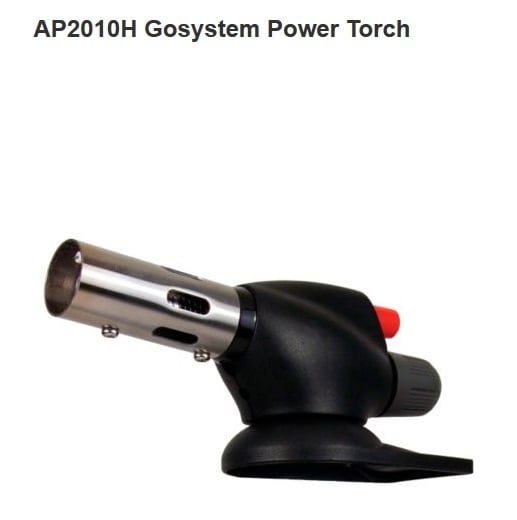
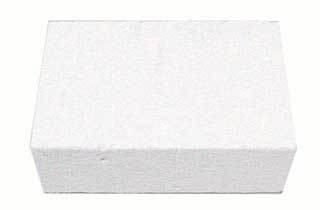
3. If you want to use a hand held torch, you can buy these from hardware stores or specialised suppliers such as www.metalclay.co.uk or www.cooksongold.co.uk Typically they cost between £12-30 and you can buy lighter fuel canisters (the same that you would fill a cigarette lighter with) from most supermarkets or newsagents. You will need a firing brick to put your piece on to protect surrounding surfaces from the heat, and again these can be bought from the same suppliers. One thing I need to add here is that I found that I preferred to use a more powerful torch for firing copper and bronze clays and a smaller one for silver clay. I've added photos of both below with an explanation of the differences.
A good idea (and something that will make you feel more comfortable and safe) is to wear protective eye glasses. These are very cheap to buy and before I had my kiln, I used them whenever I was firing anything. I'm pleased to say that they've never been put to the test!
I have to say that my preferred method of firing (pre kiln) was to use my gas hob for silver. I found that I could put the piece on the metal gauze and walk away, making sure that I was timing how long it was firing. When I first started, this took the scarey element completely away from the firing. I would then go back, a few minutes later and just turn the gas off. For copper and bronze clay I had no choice but to torch fire (a gas hob doesn't usually get hot enough for these clays to sinter properly). However, new clays are being developed all the time so you may find a brand that allows you to fire on a gas hob or camping stove.
What is the worst that can happen during firing? If you're using a hand held torch there's a possibility that you can heat the clay too much which causes blistering or in severe cases you can melt the silver, which usually ruins the jewellery. If you melt the silver, it'll simply stay on the firing brick in a messy blob! However, there are visual clues that stop you doing this and I'm intending on posting a blog on how to fire with a torch together with pictures that I hope will help. As far as I know, a gas hob and camping stove won't get hot enough for melting to occur so this risk is more associated with hand held torches.
Other than that, the only other risk is if your piece is not FULLY dry before you fire. It's essential that the clay is completely dry before you attempt to fire because if there's any moisture left in the clay, during firing it can turn to steam which causes a mini explosion where the piece disintegrates. HOWEVER, before you panic, there are ways of ensuring your clay is fully dry to completely avoid this happening. Again, I'll address this in a later blog. To put this into perspective, this has never happened to me and I've fired hundreds and pieces.
I happily fired everything on a gas hob and with a torch for at least 6 months before I invested in a kiln. I waited to make sure that I wasn't going to go off working with metal clay! I have to say that a kiln in a great investment if you're sure you're going to use it alot because it really does help the metal clay to sinter properly and the pieces are definitely more robust (especially for rings). The downside is that you have to learn to use your kiln and it's like starting all over again!
I hope this hasn't put you off. It's a fine balance trying to be honest and telling you of the problems you may have / unlikely to have.
Torch for silver metal clay - this has a built in barrell with a hole in the bottom where you fill it with fuel from a lighter fuel cannister. Note the small black nozzle:

For copper and bronze clay (that require a slightly higher temperature to sinter), I use a torch similar to this one. If you look at the nozzle, you'll see that it's much larger than the torch above. The other difference is that you screw a lighter fuel cannister into the bottom of it (rather than having a barrell that you fill).

You'll also need a fibre/firing brick. These vary in size but typically are around 6"/15cm.

